ZEN AUDIO EMBER — User Manual
- Version: 1.1.0
- Developer: ZEN AUDIO
- Supported Formats: VST3 / AU (macOS only)
- Supported OS: Windows 10 or later / macOS 11 or later
- Architecture: x86_64 / Apple Silicon (Universal Binary)
Table of Contents
1. INTRODUCTION
1-1. About ZEN AUDIO EMBER
EMBER is a saturator/exciter plugin developed by ZEN AUDIO and released in 2026.
It combines characteristics inspired by industry-standard tonal qualities with uniquely designed modern behaviors, allowing users to shape sound easily while maintaining fine control for achieving the desired result.
Main Features
12 Color Types
Choose from 12 tonal characteristics categorized as Gentle, Massive, Enhance, Focus, and Vivid.Balance of Simplicity and Precision
Carefully designed parameters — Curve, Bias, Flavor, Intensity, and Time — enable highly detailed shaping.Upward Compression
Raises low-level signals to enhance detail and presence.AGC (Auto Gain Compensation)
Automatically compensates for level differences when enabled, allowing you to focus purely on sound design.ZEN MODE
Switch to a compact interface optimized for workflow efficiency depending on your working situation.Oversampling
Up to 8× oversampling with selectable IIR/FIR filters to reduce aliasing.Preset System
Includes presets created by Japanese artists active worldwide.70+ Color Themes
Choose from more than 70 GUI themes to customize the visual appearance.
2. INSTALLATION & ACTIVATION
2-1. Installation
Windows
Download the installer (
.exe) from
https://zen.audio/emberRun the installer and select the language.
Accept the EULA.
Choose installation components:
- VST3 Plugin →
C:\Program Files\Common Files\VST3\ - Factory Presets
- VST3 Plugin →
Installation path for VST3 can be customized.
- Launch your DAW and scan plugin to load EMBER.
Microsoft Visual C++ Redistributable and Microsoft Edge WebView2 Runtime are required.
If not installed, they will be installed automatically.
macOS
- Download the installer (
.pkg) from
https://zen.audio/ember - Run the installer and select the language.
- Accept the EULA.
- Choose installation components.
- Launch your DAW and scan plugin to load EMBER.
If macOS shows “Cannot Be Opened Because the Developer Cannot Be Verified”, allow it from
System Settings → Privacy & Security.
2-2. License Status
EMBER operates differently depending on login and license status.
| Status | Condition | Behavior |
|---|---|---|
| Activated | Logged in + Activated | Full functionality |
| Trial | Logged in + Trial started | Full functionality for 14 days (once per device) |
| Trial Expired | Logged in + Trial ended | 2 seconds mute every 15 seconds |
| Limited | Not logged in | 2 seconds mute every 15 seconds |
| Inactive | Logged in + Not activated | 2 seconds mute every 15 seconds |
| Needs Activation | Logged in but activation limit reached | 2 seconds mute every 15 seconds If you deactivate one of the devices and activate again, the status will switch to "Activated" mode. |
2-3. Activation
- Launch EMBER in your DAW.
- Click the License icon (key icon) or open
Settings → Account & License. - Click Sign In to open ZEN AUDIO login page.
- Sign in to your account.
- If you own a license, activation occurs automatically and the plugin switches to Activated mode.
- If you do not own a license, Trial mode begins.
- If your trial has expired, the plugin enters Trial Expired mode.
Once activated, EMBER can be used offline indefinitely unless deactivated.
Activation Limits
- One license can activate up to 2 devices simultaneously.
- To activate another device:
- Purchase another license, or
- Deactivate an existing device.
2-4. Deactivation
Deactivation frees an activation slot so another device can be activated.
- Open Settings → Account & License
- Click Deactivate
- Confirm by clicking Deactivate again
Once communication with the server is completed, the activation slot will be released.
Limitations
- Deactivation is limited to 5 times per year per license.
- The count resets on January 1 (JST).
If the limit is reached, contact support:
Sign Out vs Deactivate
| Action | Behavior |
|---|---|
| Sign Out | Clears local login data. Plugin enters Limited mode but activation slot remains occupied. |
| Deactivate | Releases the activation slot on the server so another device can activate the license. |
3. USING ZEN AUDIO EMBER
3-1. Overview (FULL MODE)
The EMBER interface consists of the following areas:
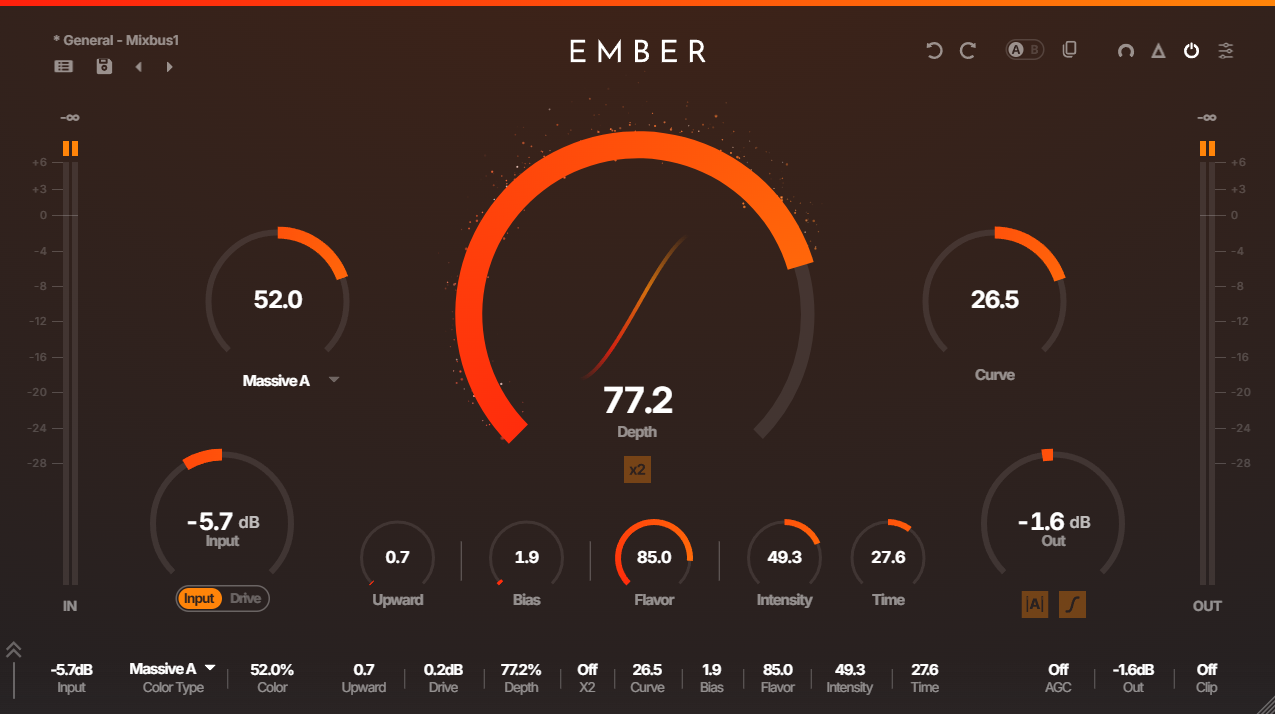
Top Panel (Presets)
Load or save presets.Top Panel (Utilities)
Access settings, tools, and status icons.Main Area
Main parameter knobs and controls.Shaping Curve
Visual representation of the shaping curve.Bottom Panel
Horizontal layout of main parameters.Resizable Window
Drag the bottom-right corner to resize.Level Meters
Left: input level
Right: output level0 dB Indicator
When the input or output signal exceeds 0 dB, the square icon at the top of the meter lights up.
The indicator can be cleared by clicking the meter.
3-2. Knobs & Buttons
Knobs
Each knob supports the following operations:
- Drag— Adjust the value
- Double-click— Enter a value directly
- Shift+Drag— Adjust the value with finer precision
- Ctrl+click / Command+click— Reset the knob to its default value
| Knob | Range | Default | Description |
|---|---|---|---|
| Input | -24.0 dB – +24.0 dB | 0.0 dB | Controls the input level before EMBER |
| Drive | -24.0 dB – +24.0 dB | 0.0 dB | Controls the input level |
| Color | -100.0 – +100.0 | 0.0 | Applies filtering based on the selected Color Type |
| Depth | 0.0 – 100.0 | 50.0 | Controls the amount of shaping |
| Curve | -50.0 – +50.0 | 0.0 | Adjusts the shaping curve |
| Bias | 0.0 – 100.0 | 0.0 | Asymmetric shaping generates even-order harmonics |
| Upward | 0.0 – 100.0 | 0.0 | Boosts low-level signals (upward compression) |
| Flavor | 0.0 – 100.0 | 0.0 | Dynamically adjusts the shaping curve based on the input level |
| Intensity | -100.0 – +100.0 | 0.0 | Adjusts shaping tone based on the input level |
| Time | -100.0 – +100.0 | 0.0 | Adjusts envelope and delay of Intensity |
| Out | -24.0 dB – +24.0 dB | 0.0 dB | Controls the output level |
Color Type
Select one of 12 filter characteristics.
| Category | Type | Character |
|---|---|---|
| Gentle | A / B / C | When positive: Boost highs and reduce lows When negative: Boost lows and reduce highs |
| Massive | A / B / C | When positive: Boost lows and highs When negative: Boost mids |
| Enhance | A / B | Emphasizes specific frequency ranges |
| Focus | A / B / C | When positive: Boost from mids to highs strongly When negative: Boost lows strongly |
| Vivid | — | Suppresses ultra-high frequencies |
Toggle Buttons
Each button toggles ON/OFF when clicked.
Lit: ON state
Unlit: OFF state
| Button | Default | Description |
|---|---|---|
| x2 (DEPTH X2) | OFF | Boosts the effect of Depth |
| AGC(Auto Gain Compensation) | OFF | Adjusts output level dynamically toward input level when enabled |
| Safety Clip | OFF | Hard-clips peaks to keep output from exceeding 0 dB when enabled |
3-3. Presets
The following controls are available in the upper-left.
- Preset Name — Displays the name of the current preset.
If the selected preset has been modified from its original values, a dirty indicator (*) appears at the beginning of the preset name to indicate that the preset has unsaved changes. - PRESET BROWSER — Opens the preset browser.
- SAVE PRESET — Saves the current parameters as a preset (
.zepfile). - ◀ / ▶ (PREVIOUS / NEXT) — Switches to the previous/next preset.
PRESET BROWSER
Displays a list of all presets (factory + user).
Presets are displayed in a list format and can be filtered or sorted by name, author, and favorites.
The available functions are as follows.
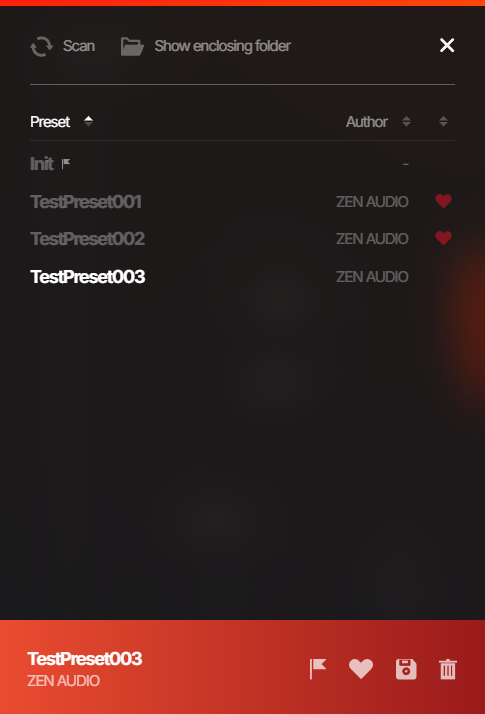
| Function | Description |
|---|---|
| Scan | Reloads the presets in the folder where presets are stored |
| Show enclosing folder | Opens the folder where presets are stored in the OS file explorer |
| Add/Remove Favorite | Adds or removes the selected preset from favorites Displayed with a heart icon |
| Set/Unset Default | Sets or unsets the selected preset as the default preset when EMBER is launched Displayed with a flag icon |
| Save Preset | Saves the current parameter state as a preset |
| Delete Preset | Deletes the selected preset |
SAVE PRESET
Saves the current parameter state as a preset.
You can save a preset by clicking SAVE PRESET in the top panel, or by selecting any preset in the preset browser and clicking Save Preset.
- Preset name: — Enter the name of the preset to save. If the same name as an existing preset is used, it will overwrite that preset.
- Author: — Enter the name of the preset author.
3-4. Utilities
The following controls are available in the upper-right.
| Control | Description |
|---|---|
| License Icon | Displayed when the plugin is not activated, and clicking it will show a sign-in prompt Displayed with a key icon |
| UNDO | Reverts the last action |
| REDO | Reapplies the last undone action |
| A/B | Toggles banks A and B, each able to store the current state. |
| A/B COPY | Copies the selected bank to the other one |
| ZEN MODE | Toggles "ZEN MODE" for simple UI operation |
| DELTA | Outputs only the part of the signal affected by EMBER when enabled. |
| MASTER ON/OFF | Turns the plugin processing on/off |
| SETTINGS | Opens the settings screen |
| Bottom Panel Button | Toggles the visibility of the bottom panel (FULL MODE only) |
3-5. ZEN MODE
ZEN MODE is a compact UI display mode.
Use it when you want to save screen space or simplify operations to improve workflow efficiency.
The values of parameters that are hidden are not reset and remain unchanged.
Click the ZEN MODE button in the utilities again to return to the FULL MODE screen.
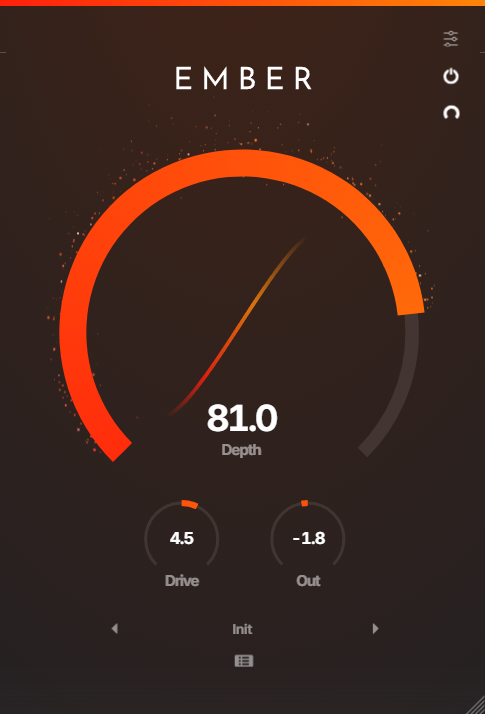
- Depth — Same as DEPTH in FULL MODE
- Drive — Same as DRIVE in FULL MODE
- Out — Same as OUT in FULL MODE
- Shaping Curve — Same as the shaping curve in FULL MODE
- SETTINGS, BYPASS, ZEN MODE ON/OFF — Same as in FULL MODE
- Presets — Same as presets in FULL MODE
- Mini Level Meter — The left meter shows input level and the right meter shows output level, displayed in a simplified form compared to FULL MODE
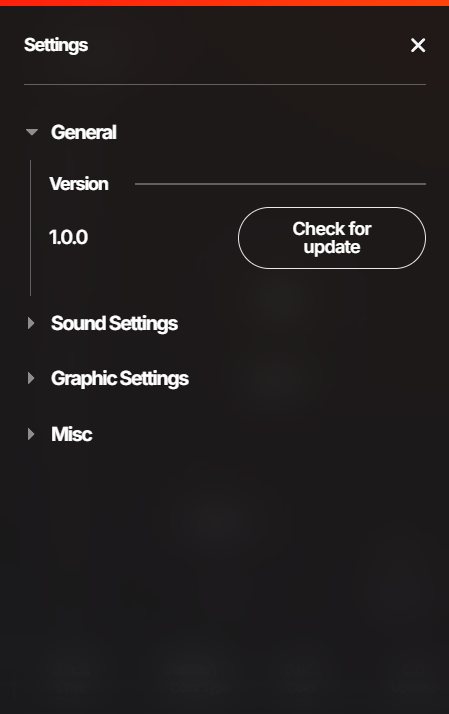
3-6. SETTINGS
Clicking SETTINGS displays four pull-down menus.
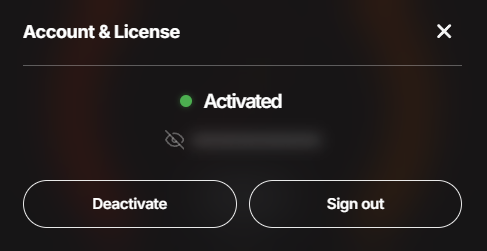
Account & License
You can check the current license status and username, as well as perform login/logout and activation/deactivation.
Settings
Allows you to change various settings related to EMBER.
For details of each item, please refer to the sections starting from 3-6-1. General.
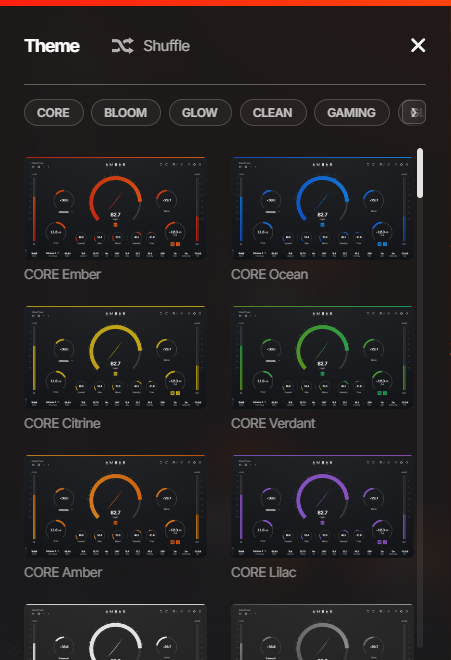
Theme
You can change the theme of EMBER. Click any theme from the list displayed on the left side of the screen to apply it.
You can roughly sort themes by category by selecting or deselecting the tags at the top of the screen, or click Shuffle to switch to a randomly selected theme.
Online Manual
Opens the EMBER online manual. (launches your browser)
3-6-1. General
You can check the current version of EMBER and whether a new update is available.
Click Check for updates to check for the latest update. If an update is available, a download link will be displayed.
3-6-2. Sound Settings
Oversampling
Allows you to configure oversampling settings.
| Setting | Options | Description |
|---|---|---|
| Factor | 1x / 2x / 4x / 8x | Select the oversampling multiplier |
| Filter Type | IIR / FIR | Select the filter type |
| Set as default | - | Sets the current oversampling settings as the default for EMBER |
Headroom Protection
Allows you to change settings related to the input level limit.
By default, both the input and output levels are limited to +6 dB.
The input level limit can be disabled by setting this option to OFF (not recommended).
The output level limit cannot be changed.
| Setting | Options | Description |
|---|---|---|
| INPUT | ON / OFF | Enables or disables the +6 dB input level limit. |
DC Filter
Changes the DC Filter setting.
Automatically removes ultra-low frequencies caused by asymmetric distortion.
| Setting | Options | Description |
|---|---|---|
| Enable | ON / OFF | Enables or disables the DC Filter. |
3-6-3. Graphic Settings
Allows you to change GUI-related settings.
GUI Scale
Adjusts the display scale of the entire GUI.
You can select from 75 / 100 / 125 / 150 / 175 / 200%, or resize the window freely by dragging the bottom-right corner of the screen.
Effect Quality
Allows you to change the settings related to effects (particles and glow) that appear during GUI operations.
| Option | Behavior |
|---|---|
| OFF | No effects |
| Default | Displays particles |
| Ultra | Displays high-density particles and glow |
Panels Opacity
Allows you to adjust the opacity of the top panel and bottom panel individually.
There are three levels, where 1 is the most transparent and 3 is the least transparent.
| Setting | Options | Description |
|---|---|---|
| Top | 1 / 2 / 3 | Sets the opacity of the top panel |
| Bottom | 1 / 2 / 3 | Sets the opacity of the bottom panel This setting is not displayed when the bottom panel is hidden |
Level Meter
Allows you to change settings related to the level meter.
| Setting | Options | Description |
|---|---|---|
| Display | Hide / Show | Hide disables the display, Show enables it |
| Peak Hold Time | Adjustable slider | Duration for displaying the peak indicator (0.1–10 seconds) Set to Instant to hide, ∞ to hold indefinitely |
| Headroom | 0 dB / +3 dB / +6 dB | Changes the displayed maximum value |
3-6-4. Misc
Allows you to change auxiliary settings.
Language
Help Text
Displays explanatory text at the top of the screen when the mouse cursor is placed over each control.
| Option | Behavior |
|---|---|
| OFF | Help text disabled |
| EN | Displays help text in English |
| JA | Displays help text in Japanese |
Input
Knob Wheel
Allows you to change the direction in which parameters increase or decrease when operating knobs with the mouse wheel.
| Option | Behavior |
|---|---|
| Normal | Default direction (scroll up to increase, scroll down to decrease) |
| Inverted | Reversed direction (scroll down to increase, scroll up to decrease) |
4. SUPPORT
If you have any questions or inquiries, please contact us using the following links.
- Support: https://zen.audio/support
- Product Page: https://zen.audio/ember
- Account Portal: https://zen.audio/my-account
© ZEN AUDIO. All rights reserved.
Release Notes
- Input knob has been added. Adjusts the input signal level before EMBER processing. Accessible by toggling the display with the Drive knob.
- DC Filter has been added. Automatically removes ultra-low frequencies caused by asymmetric distortion. Can be toggled ON/OFF in Settings.
- Delta has been added. Allows monitoring the difference between the pre- and post-EMBER signal.
- 8 new themes have been added: BLOOM Princess, BLOOM GreenTea, BLOOM Leviathan, GLOW Jade, GAMING Vapor, GAMING Sorbet, GAMING Ridgeline, GAMING Voyager
- 11 new presets have been added.
- 0 dB indicators have been added to the top of the level meters. When the input or output signal exceeds 0 dB, the square icon at the top of the meter lights up.
- Improved initialization behavior when switching OverSampling settings.
- Other minor improvements and bug fixes.
- Fixed an issue where, in some DAWs, audio rendered through EMBER is not processed correctly for the first few tens of milliseconds at the beginning of the export range.
- Implemented Headroom Protection to prevent the input and output signals from exceeding +6 dB. This protection can be disabled for the input signal only in Settings.
EMBER Release.